The testing phase complete, I have begun the installation.
Before I detail that I'll talk about the testing phase.
In the testing phase, all the boards and sensors are hooked up in the proper order, and plugged into the USB connector on the computer, to be powered up and tested through the software.
I laid mine out on poster board, which proved convenient as it was strong enough to hold the laid out sensors, and convenient to move them to other locations out of the way, as I lack a lot of free surface space at this time.
The testing phase went well save for one hitch, in which the last board's sensors would only function once in a blue moon.
After some helpful advice from Dr. McPherson, and reading about previous installations on the Touchkeys group, the most probable cause for this appeared to be a lack of sufficient power from the USB port.
I spent a good deal of time fiddling around with possible solutions -- plugging the USB cable into all sorts of ports, and failing at solving the problem. A solution that had worked for others -- using a y shaped USB cable that added an extra connection for more power -- did not work.
Finally, approaching the problem from a software fix viewpoint rather than hardware fix viewpoint gave the solution -- I changed some settings on my motherboard's BIOS for how it handled USB connections, and from then on, all 88 sensors received enough power.
A happy relief and success, a prayer of thanks, and on to the installation.
This is the first installation on an FP-90 to my knowledge. Would the boards even fit in the keyboard?
The first step is to open up the keyboard.
Being as I am rather new to this all, it is the first time I am opening up a keyboard. And this, an especially pricey graded hammer action piano keyboard.
My fear naturally was that upon opening, something would spring out, and it would all fall apart and be impossible to put back together. It would all fall to pieces . . .
This actually did not happen. . . this time.
The Lord is merciful.
I turned the keyboard on its back, and tried to decide which screws to take out of the bottom of it. There was someone else who had opened up one of these and posted pictures online, so I had an idea, but he had not shown what screws he had taken out of it.
I guessed. . . correctly. I left the ones that should not come out (in front on the bottom along the keybed), and took out the ones that should (all the rest, about 33 screws).
I had tried leaving the screws in the middle, but the keyboard would not open, so step by step they all went. Finally it opened up, and painlessly I set the cover up on its side.

Here're some close-up photos of the opened up Roland FP-90.


I gave the insides a good look over. So this was what the keyboard action looked like.


Let's try placing some sensors on the keys and seeing how it all lies.
This is not going to work, the speakers are in the way. I couldn't secure the boards properly like this either. Should I ask Dr. McPherson for longer sensor cables? Even if they are available I do not want to wait and have to mail back these. If the speakers are in the way, I do not mind if they come out of the FP-90.
The line out should still work, though I have never actually used it. I so rarely use the speakers, it will be fine to remove them.
To remove the speakers at first I try removing the spade clips. They are stuck, and fiddling around with paper clips is not working. I will attempt it from the other end. The connectors to the boards for the speakers are easy to remove.


Now I have to remove the zip ties. I am no more successful despite zip-tie removal lessons, so I simply clip them off with snippers.
Now to unscrew the speakers. The screws are in deep, but I have an extra long screwdriver bit on hand. Four screws remove from the left, four from the right, and the speakers come out.


The keyboard looks a lot emptier inside now.
It is also lighter, an added benefit.
Let's place the sensors on the keys and see how the ribbons lie.

Yes there is more space, but there is a new potential issue.
This is a graded hammer action keyboard. Look at how there are slightly different shapes for the weights on the ends of the keys as you go along from the treble end to the bass end of the piano.


If left lying as they are the weights hit the ribbons.
I think about it and decide I need a bridge to lay the ribbons over so they don't lie down and touch the weights.
I head up to my workshop and look over the materials. After some measurements, I take apart an old project's materials and judge whether it will work. Two pieces appear about the right height. I place them in the piano and test it. No, they are too thick, they get in the way of the two supports in the middle.
I could cut them up a bit more, but I'd prefer something thinner to go entirely across the board. Back to my workshop upstairs, I find just the piece, no cutting or adjusting necessary likely enough, it is quite thin but sturdy. If necessary I will cut it later, but it looks to fit, and the height is perfect for the ribbons to lie over.
I am also now applying the sensors to the keys.
My concern is that I will apply them crookedly. I am an awkward combination of occasionally butterfingers and bothered by more than slight imprecision.
I shall have to take special care.
First I score the back of one sensor, to remove the seal on the sticky backing partly. I decide to remove almost all the seal, except at the end near the ribbon door, so that if in the future I need to access that it will be a little easier. If I had the patience I could score each sensor's back multiple times to make for easier removal in future, but it's fine I do not wish to.
My concern that once the sensors touched the keys they would stick immovably proved false. If only lightly placed down it is possible to adjust them, so I can precisely place them, and after doing so press down hard to adhere them fully, it is the best situation.


Now I simply have to proceed key by key.
Let's see, before putting on more, how does it look with the cover back on, let's quickly see.


Looks good! Let's proceed key by key. .
Before I detail that I'll talk about the testing phase.
In the testing phase, all the boards and sensors are hooked up in the proper order, and plugged into the USB connector on the computer, to be powered up and tested through the software.
I laid mine out on poster board, which proved convenient as it was strong enough to hold the laid out sensors, and convenient to move them to other locations out of the way, as I lack a lot of free surface space at this time.
The testing phase went well save for one hitch, in which the last board's sensors would only function once in a blue moon.
After some helpful advice from Dr. McPherson, and reading about previous installations on the Touchkeys group, the most probable cause for this appeared to be a lack of sufficient power from the USB port.
I spent a good deal of time fiddling around with possible solutions -- plugging the USB cable into all sorts of ports, and failing at solving the problem. A solution that had worked for others -- using a y shaped USB cable that added an extra connection for more power -- did not work.
Finally, approaching the problem from a software fix viewpoint rather than hardware fix viewpoint gave the solution -- I changed some settings on my motherboard's BIOS for how it handled USB connections, and from then on, all 88 sensors received enough power.
A happy relief and success, a prayer of thanks, and on to the installation.
This is the first installation on an FP-90 to my knowledge. Would the boards even fit in the keyboard?
The first step is to open up the keyboard.
Being as I am rather new to this all, it is the first time I am opening up a keyboard. And this, an especially pricey graded hammer action piano keyboard.
My fear naturally was that upon opening, something would spring out, and it would all fall apart and be impossible to put back together. It would all fall to pieces . . .
This actually did not happen. . . this time.
The Lord is merciful.
I turned the keyboard on its back, and tried to decide which screws to take out of the bottom of it. There was someone else who had opened up one of these and posted pictures online, so I had an idea, but he had not shown what screws he had taken out of it.
I guessed. . . correctly. I left the ones that should not come out (in front on the bottom along the keybed), and took out the ones that should (all the rest, about 33 screws).
I had tried leaving the screws in the middle, but the keyboard would not open, so step by step they all went. Finally it opened up, and painlessly I set the cover up on its side.

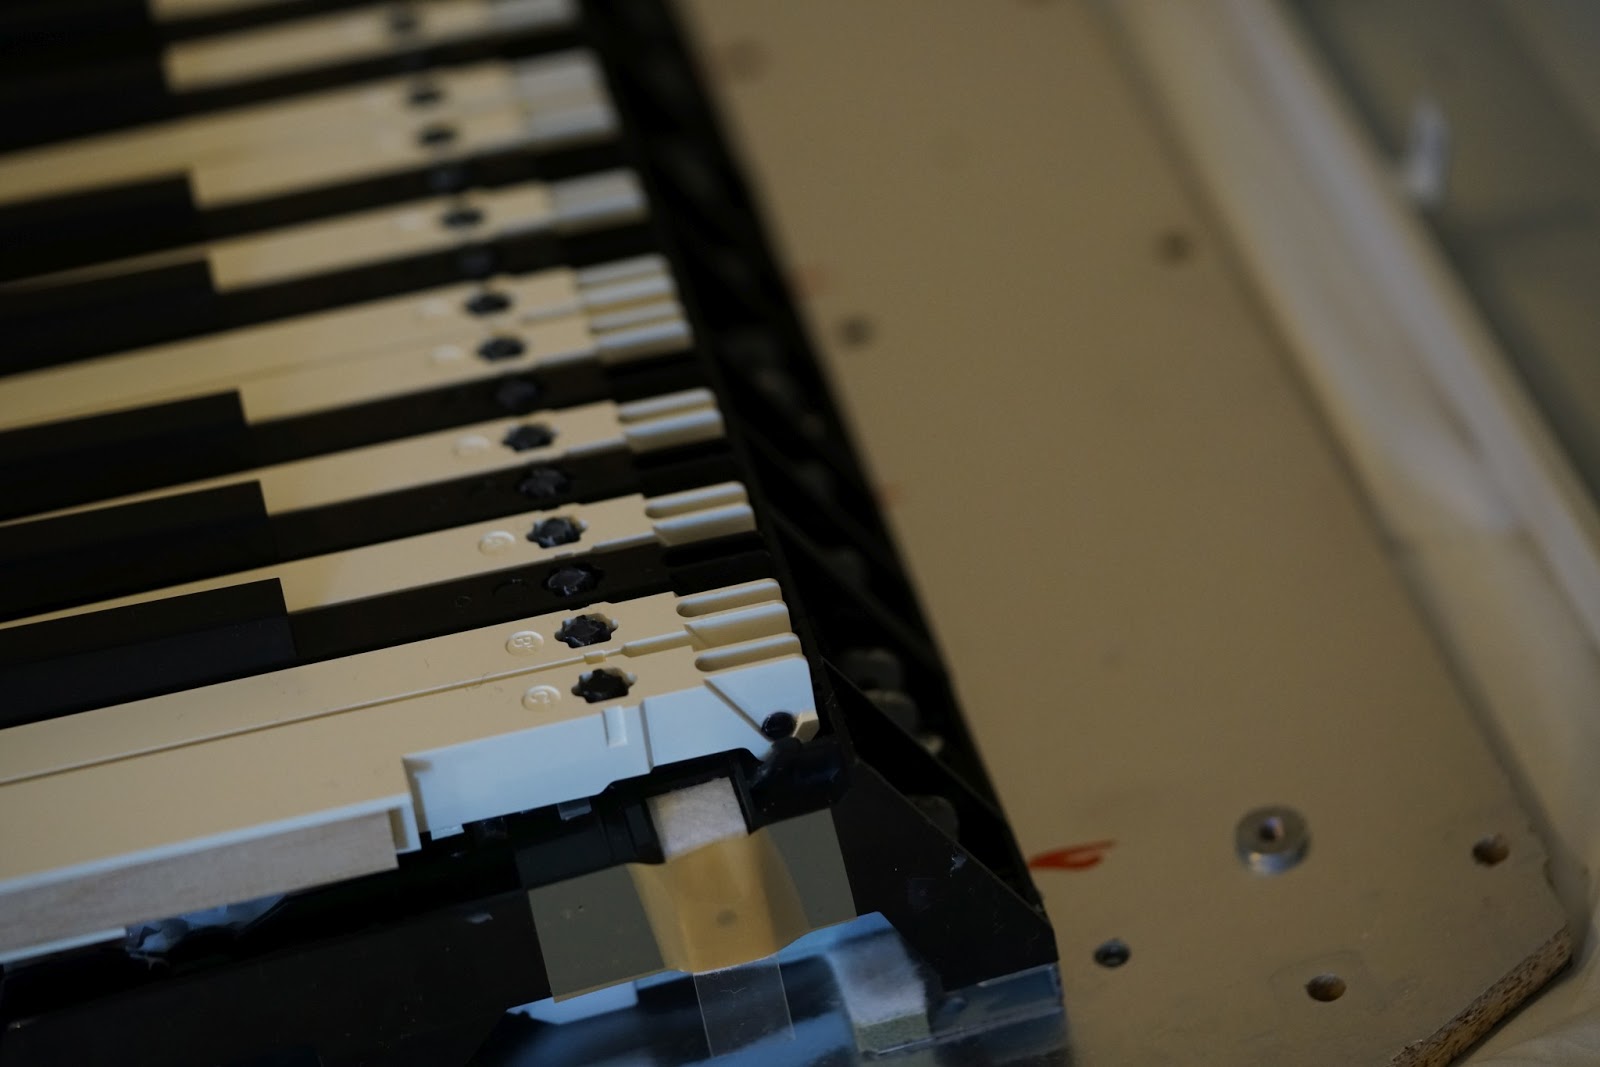
Here're some close-up photos of the opened up Roland FP-90.


I gave the insides a good look over. So this was what the keyboard action looked like.


Let's try placing some sensors on the keys and seeing how it all lies.
This is not going to work, the speakers are in the way. I couldn't secure the boards properly like this either. Should I ask Dr. McPherson for longer sensor cables? Even if they are available I do not want to wait and have to mail back these. If the speakers are in the way, I do not mind if they come out of the FP-90.
The line out should still work, though I have never actually used it. I so rarely use the speakers, it will be fine to remove them.
To remove the speakers at first I try removing the spade clips. They are stuck, and fiddling around with paper clips is not working. I will attempt it from the other end. The connectors to the boards for the speakers are easy to remove.


Now I have to remove the zip ties. I am no more successful despite zip-tie removal lessons, so I simply clip them off with snippers.
Now to unscrew the speakers. The screws are in deep, but I have an extra long screwdriver bit on hand. Four screws remove from the left, four from the right, and the speakers come out.


The keyboard looks a lot emptier inside now.
It is also lighter, an added benefit.
Let's place the sensors on the keys and see how the ribbons lie.

Yes there is more space, but there is a new potential issue.
This is a graded hammer action keyboard. Look at how there are slightly different shapes for the weights on the ends of the keys as you go along from the treble end to the bass end of the piano.


If left lying as they are the weights hit the ribbons.
I think about it and decide I need a bridge to lay the ribbons over so they don't lie down and touch the weights.
I head up to my workshop and look over the materials. After some measurements, I take apart an old project's materials and judge whether it will work. Two pieces appear about the right height. I place them in the piano and test it. No, they are too thick, they get in the way of the two supports in the middle.
I could cut them up a bit more, but I'd prefer something thinner to go entirely across the board. Back to my workshop upstairs, I find just the piece, no cutting or adjusting necessary likely enough, it is quite thin but sturdy. If necessary I will cut it later, but it looks to fit, and the height is perfect for the ribbons to lie over.
I am also now applying the sensors to the keys.
My concern is that I will apply them crookedly. I am an awkward combination of occasionally butterfingers and bothered by more than slight imprecision.
I shall have to take special care.
First I score the back of one sensor, to remove the seal on the sticky backing partly. I decide to remove almost all the seal, except at the end near the ribbon door, so that if in the future I need to access that it will be a little easier. If I had the patience I could score each sensor's back multiple times to make for easier removal in future, but it's fine I do not wish to.
My concern that once the sensors touched the keys they would stick immovably proved false. If only lightly placed down it is possible to adjust them, so I can precisely place them, and after doing so press down hard to adhere them fully, it is the best situation.


Now I simply have to proceed key by key.
Let's see, before putting on more, how does it look with the cover back on, let's quickly see.


Looks good! Let's proceed key by key. .
Comments
Post a Comment